In recent years, automatic identification technologies using computer technology have become widespread. These technologies are aimed at increasing productivity and reducing labor costs.
Bar code– an information sign designed for automated identification and recording of information about a product, encoded in the form of numbers and strokes.
Barcode features:*
- Identification of goods using special devices;
- Automation of accounting and control of goods;
- Operational management of goods movement;
- Increasing the speed of customer service;
- Information support for buyers.
*Also, in accordance with the requirements of foreign trade transactions, the presence of a bar code on the packaging of goods is a mandatory condition for its export.
Component 1C Barcode Printing
Often the user is faced with a situation where it is necessary to display a barcode on a 1C 8.3 printed form, document or label. 1C 8.3 programs use a product barcode system, which allows you to quickly select products and many other actions. The “1C: Barcode Printing” object is intended for its output in printed form. This control element is designed to generate barcodes in the following formats:
EAN8, EAN13, EAN13 AddOn 2, EAN13 AddOn 5, ITF14, RSS14, EAN128, Code39, Code39 Full ASCII, Code93, Code128, Code16k, Industrial 2 of 5, Interleaved 2 of 5, CodaBar, PDF417.
It supports auto-detection of the barcode format, it is possible to transmit the symbolic value of the barcode both with and without a control character, as well as the ability to disable the display of the barcode control character on the resulting barcode image.
If this element is not installed, when you try to print, the computer will display an error with the text: “The 1C barcode printing component is not installed on this computer.” Accordingly, it is necessary to install it.
Also, other errors may occur when printing, for example, “External component error” - 1CBarCode: incorrect value of the “Font” property. Its correction can also be “cured” by installing the latest version of the “1C: Barcode Printing” component – “1CBarCode.exe”.
Fig.1 Error message
Thus, in order for printing to be available on your computer, you must install the “1CBarCode.exe” component. You can download it on the website.

Fig.2 Window for downloading components for barcode printing
This driver is used in configurations that do not contain “1C: Library of Connected Equipment”.

Fig.3 Window for downloading components for barcode printing
After downloading the file, we will install it.

Fig.4 The first window for installing components for barcode printing
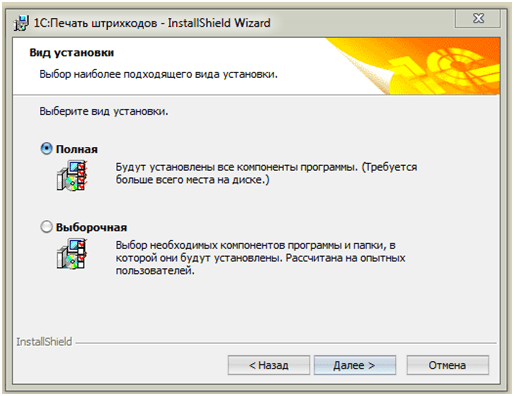
Fig.5 Second window

Fig.6 Third installation window
After installing this component, you should not encounter any errors when trying to create barcodes.
Printing price tags with barcodes
Let's look at barcode printing using 1C: Retail as an example. Let's turn to the item "Item prices" and consider printing price tags for goods for which a price has already been assigned.

Fig.7 Menu item “Item prices”
From the document “Setting item prices” in the “Print” button, printing price tags and labels is available.

Fig.8 Drop-down menu of the program “Print price tags” and “Labels”
Products will already be selected for processing, so we will need to set a “Price Tag Template”. If it doesn't exist, it's easy to create it.

Fig.9 Create a label template

Fig. 10 Price tag with barcode
By clicking the “Edit Layout” button, go to the template editor and select “Load default template”.

Fig. 11 Creating (editing) a price tag template with a barcode
Based on the ready-made template, you can create your own design. Insert a logo, change fonts, colors. You can also import a price tag template if you have a ready-made option. On the left side we see the available fields. We were interested in the “Barcode” field (in our example, this option is sufficient for now).
Having selected the created template, select the required products and click the “Print” button.
Fig.12 Printing a price tag with a barcode
We have printed the barcode of the product.

Fig. 13 Printing the document “Price tag with barcode”
Inserting a barcode into a 1C printed form layout
In addition to using the built-in capabilities of the program, you can develop layouts of printed forms yourself using a barcode: in the configurator, open the layout of the printed form of the desired document and go to the menu “Table - Drawing - Insert object”.

Fig.14 Configurator window. Inserting an object
In the window that appears, switch the pointer to the “Control element” position and we will see that the object type “1C.V8. Barcode printing."

Fig.15 Configurator window. Inserting a “Control” object - Barcode printing object
We saw how you can add a barcode to existing forms if necessary, as well as create custom printed form layouts.
To print labels, both standard A4 printers and devices specially created for this purpose are used. It is worth considering that printing on a special device will be faster and more convenient. In this case, you need to create your own label template for each printer.
Generating a label template for a standard printer
In our example, the label layout will be created with certain dimensions: width 3.8 cm and height 1.9 cm. In this case, on an ordinary piece of A4 paper, 5 labels will fit across and 14 along the page. Most often, the template contains only the necessary data: the name of the product, its cost and barcode.


In the 1C: Retail program, the layouts of all labels are placed in the directory “Templates for labels, price tags and cash register receipts”. Let's go to the "Administration" section and run the "Print forms, reports and processing" command.
Launching the “Print forms, reports and processing” command
After this, a special window will open in which we will open the directory “Templates for labels, price tags and cash register receipts”.
Launch of the directory “Templates of labels, price tags and cash register receipts”
In the launched window, using the “Create” button, we create a new label layout.


List window of the directory “Templates of labels, price tags and cash register receipts”
In the layout creation window, be sure to fill in two fields: “Template type” and “Name”. Layout type can have multiple meanings.
Let’s choose the value “Label (price tag) for the product.” At the same time, we will indicate the name we need for the layout - “Label for A4”. To edit the template later, each created element must be recorded.
Layout window
In the window of the saved directory component, to change the template, click on the “Edit Layout” button. A new window will open in which you can edit the template.
Window for changing the layout of labels and price tags

Let's look at the elements of this editor. On the right side are the customizable layout settings. Here you can adjust specific settings for barcode printing (Code Type, Text Display, Font Size, and Rotation Angle). There are also 2 settings here, thanks to which you can find out the number of labels placed on one sheet horizontally and vertically.
On the left side of the editor there is a list of fields that can be used in the template. Data on the prices of the item, store, institution, time and user is also posted here. Additionally, there is information about the product: nomenclature, features and barcode.
The main part of the editor is intended for creating (drawing) a template. The product "1C: Retail 2" has a standard label layout. In order to use it, you need to click on the “Load default template” button in the editor window and select “Label” from the drop-down menu.

Selecting a Standard Label Layout
The 1C: Retail program will issue a request to confirm the replacement of the modified layout with a standard template.
Request to replace a reconfigurable layout
To see what the default layout is, you must agree to this request. After this, the layout will open in a spreadsheet document.
Part of a spreadsheet document. Default label template

The standard label template contains only the product name and barcode. It is worth considering that the size of the labels will be larger than we need according to the original conditions. Do not forget that the editor does not have a ruler with convenient divisions up to millimeters.
To access changing the “Column Width” setting, you need to select any column by clicking on its serial number, and then go to the context menu.
Go to the “Column Widths” parameter using the context menu
After selecting this item, the “Column Width” window will open, where you can easily set the required width.
Column Width Window
Unfortunately, the width in the program is measured not in millimeters, but in conventional units. However, there is a way to generate a label template with values in millimeters. To do this, you need to go to the “Configurator” of “1C:Enterprise 8” using the “1C:Enterprise” launch form.
Opening the configurator
In the “Configurator” you need to open a new spreadsheet document by going to the “New” field in the “File” menu item. After this, a window for selecting the type of new document will appear and here you need to select “Tabular Document”.
Launching the “Select document type” window
As a result, a new table file will be generated and if you move the border of any column in it using the mouse, the values of two settings will appear in the configurator form in the lower left corner: “Position” and “Size”. In this case, they will be displayed in millimeters. “Position” is the interval from the left margin of the Tabular file to the left margin of the current column that is currently being adjusted. “Size” is the actual width of the column.


Table file
In our particular case, one column of cells is enough for a label. Let's set the width of the first column to 38 mm. Do not forget that there is some error when specifying a specific value in millimeters. This arises because this indicator can correspond to several possible field positions that differ by less than 1 mm. However, for our conditional example, this does not yet significantly interfere with achieving the result.
Setting the width of the label We will print three lines about the product on the surface of the label: name, barcode and cost. This is why when setting the layout height you need to move the bottom margin for the third line. In our example, we need to set the required value for the “Position” parameter, which displays the distance from the top border of the “Spreadsheet Document” and we will set it at 19 mm.
Label width assignment
After these manipulations, you need to save all changes in the Spreadsheet document by selecting “Save As” in the “File” menu section.
Action to save all changes to a file
After this, a new form for saving the file will become available.
After all these manipulations, we move on to the window for changing the layout of the label and price tag. In this window, execute the “Import” command. The program will automatically issue a warning that the current layout will be destroyed and will ask for confirmation to proceed further.

Importing a Spreadsheet Document
If you confirm this action, a new window will appear for selecting the imported file.
Window for selecting the imported file
We load the imported file and after the operation, all required label sizes will be automatically selected.

Spreadsheet document that was imported
After this, you only need to enter the name of the item, barcode and cost of the product into the template. To do this, select the top cell in which the name of the item will be placed and, using a double click of the mouse, display the field we need for entering information. The barcode needs to be added to the second cell and during this action the 1C: Retail program will issue a request: add a new barcode as an image or not.

Adding a barcode
If you choose to add a barcode as a picture, an image will be created that will be recognized by a barcode scanner in the usual way. Otherwise, the barcode will be generated as text. Once you confirm the program's request, the barcode will be added as an image. In this case, it will be filled according to the size of the selected cell.

Table file after barcode creation
Let's expand the barcode a little in the vertical direction.

Vertical barcode expansion
According to the standard settings, each image, including the barcode, is automatically surrounded by a line when created. To delete a line we don’t need, we need to select the barcode, call up the context menu and click on the “Properties” button.


Launching the Properties Palette command
As a result, the “Properties Palette” command will be executed and for the “Line Style” setting, select the “No line” option. Additionally, for the “Picture Size” setting, define the “Proportional” option. According to this parameter, the barcode will have a constant visual design. At the same time, text data will be output correctly.

Changing Barcode Settings
It is important to point out that in order to print a barcode, you need to have the 1C:Print module installed on your computer. It can be easily downloaded from the 1C user technical support web resource.

Select the third cell and double-click on the free “Price” field and add this value. Since in the “Retail 2” configuration the price is entered in rubles by default, then on the right side of the “Price” setting we add the signature “rubles” at intervals.
Adding the “Price” value to the template
For our cell with cost in the “Properties Palette” => “Property Value” => “Horizontal Position”, set the “Center” option.


Setting the characteristics of a cell with a cost
For the cell with the name of the item, set the “Placement” parameter to the “Crop” value. Thanks to this, if our item name is too long, then the part that does not fit into the cell will be automatically cut off. Since the main information on the label is contained in the barcode, such a reduction will in no way reduce its information content.


Adjusting the settings of the cell with the item name
Also in the layout change window, it is possible to adjust settings that allow you to edit the barcode output: “Code type”, “Reflect text”, “Font size”, “Rotation angle”.

Barcode output editing settings
The “Code Type” option is set to “Auto” as standard, but this parameter can easily be changed to any other required: “EAN13”, “EAN128”, “Code39” and so on. There is not much need for such a change, since the “Auto” setting is universal.
Using the “Display text” option, you can configure the display of the barcode in text form. So, if this option is checked, then you can set the “Font Size” for the barcode numbers.

Additionally, you can adjust the “Rotation Angle” during final barcode printing. The Default Rotation Angle (0%) setting means that the barcode will be printed in a landscape orientation, just like the template we created. At the same time, this angle can be 90%, 180% and 270%.
For all of the above settings, the standard options completely satisfy us. You just need to set the print area by selecting the entire template and clicking on the “Set print area” button.

Setting the print area
As a result, you only need to specify the settings: “Horizontal quantity” and “Vertical quantity”. As indicated at the very beginning of our conditional example, a standard A4 sheet should fit 5 labels horizontally and 14 vertically. We set exactly these parameters in the appropriate fields and click on “OK”.

The 1C: Retail program will automatically check the correctness of the set parameters and if the required number of labels actually fits on an A4 sheet, the editor window will close, otherwise a notification will appear about the actual possible number of labels. If such notifications appear, then the layout dimensions need to be slightly reduced along the horizontal and vertical axis. When decreasing along the horizontal axis, it is necessary to slightly reduce the barcode or its image until the border of the template is fully visible. After successfully closing the editor window, you need to finally save the corresponding directory element (layout).

Saving the directory element “Templates of labels, price tags and cash register receipts”
Formation of a label template for a special printing device
Let’s take as a basis the already created label layout for a standard printer and go to the reference book “Templates for labels, price tags and cash register receipts”. In the directory list window, click on the “Create a new element by copying the current” button.

Forming a new layout by copying a previously created one
A window will appear for generating a new layout, which will already contain data from the previously created template. You only need to correct the “Name” before saving it.

Window for creating a new layout
Having saved the layout using the “Save object” button, we move on to changing the object by clicking on the “Edit layout” button.
In the window for changing the label and price tag, we clearly see that the previously created template and all its parameters were completely copied.
Layout Change Window
To print correctly on a special printer for labels according to this template, you need to change the print settings, for which we will use the “Page Settings” button.


Launching the Page Setup window
In the “Printer” cell you need to select the appropriate device for printing, and in the “Size” field - the required label for this printer. In our case, we use a model with dimensions of 40 by 20 mm, while adjusting the printer itself is not discussed in this article. You also need to reset all padding for the page.


Setting Printing Preferences
In the layout change window, you need to set the settings: “Horizontal quantity” and “Vertical quantity”. From a computer's point of view, a label printer is an ordinary printer with a small print area.

A single label will be one page and therefore the options “Horizontal quantity” and “Vertical quantity” will be equal to one. Let's use the page preview function by clicking on the magnifying glass icon on the top panel of the program.
Preview
The label fits almost entirely on a page measuring 20 by 40 mm, and when printed on a standard A4 printer, we formed a label measuring 38 by 19 mm. Therefore, it is worth increasing it a little in both sizes, and for additional control we will use the preview again. After all the checks, click on the “OK” button in the layout editing window and after closing the editor, save the directory element (layout) again.
Label printing
For this action, let’s start the “Print Labels and Price Tags” processing and go to the “Inventory and Purchases” sub-item, then to “Service” and run the “Print Labels and Price Tags” command.

Running the “Print Labels and Price Tags” command
This command window will appear.

Window "Print labels and price tags"
You need to run the “Set print mode” command in the tabular panel of the window, after which a menu will appear where you need to select the “Print labels” command.

Selecting a Print Mode
Let's set the value for the "Store" field, set the method of obtaining the cost "By price type" and decide on the value of the price type. Let’s set the product selection settings for filling out the “Products” tabular section by clicking on the “Show selection” button in its command panel.
Above the “Products” tabular part, elements for selecting conditions and a list of fields that can be changed will become available.

Part of the “Print labels and price tags” form with selection fields
Among other standard selection criteria for printing itself, the following are considered important: “Only with a barcode”, “Only with prices” and “Only with stock balances”. Opposite them we will check the boxes to apply these criteria.
After this, you need to click on “Fill”. When filling in this way, the 1C: Retail program automatically indicated the number of labels for each line, which is equal to the number of goods in the warehouse balance, since the label is printed for a separate unit of goods.
Select all lines of the table field using the key combination “Ctrl+A”, run the “Install” command and in the window that appears, click on “Label Template”.

Selecting a label layout for selected stitches
A selection window will appear with a list of layouts.
Layout selection window
After defining the layout, the “Label template” column in the table field will be filled with certain values and all previously selected lines will be marked with a flag, which signals their selection for printing.
Table field "Products" after defining the label layout
Then click on “Print” and in the “Print labels and price tags” window you need to run the “Print” command.
As a result, a table file will be created that will contain labels for the goods from the list in the required quantity.
Let's take a label for a label printer as a layout and create a table file again. In the figure below you can see part of the printed file, and each label will be printed on a separate sheet.

Part of the document that will be printed
- Label layouts in “1C: Trade Management 11”
- In this program, to open the list of layouts, you need to go to the following menu item: “Administration” => “Print forms” => “Reports and processing” => “Label and price tag templates”. Template changes are made in the same way, with the exception of the following nuances:
- the parameters of the current template cell open in the right side of the editor;
- it is possible to customize the dimensions of the template and table file cells in millimeters;
- the number of elements on the sheet is not very obvious;
You can assign the current layout to a system object if it has the ability to activate a default layout.
If it doesn’t work out for you, then our specialist can come and.
Let's set it up. Let's connect. We'll fix it. Let's find error 1c.
1C: Entrepreneur 8
The program "1C:Entrepreneur 8" was created for accounting and reporting by individual entrepreneurs (IP, PE, PBOLE). The program allows you to maintain a book of income and expenses and business transactions of individual entrepreneurs who are payers of personal income tax (NDFL).

1C: Enterprise 8 Licenses.
If you need to work with the 1C program on more than one computer (this can be a local network), as well as when working in one 1C database, it becomes necessary to buy 1C licenses. 1C licenses are additional protection keys for 1C programs that are purchased separately and give the right to use on several computers.

This lesson shows how to create print templates and print labels and price tags for a selected group of products.
The procedure for printing both price tags and labels is identical, so I will show the process using the example of label printing.
Creating a label template (LS)
Labels and price tags are printed using templates, open the list:

Create a new one:

We indicate the name and size of the printed ribbon, select the purpose from the list:

The tape size is also selected from the list:

In field For what a specific item card is selected, using an example of which it will be possible to create a test stamp.
If the proposed SE does not suit you and you want to modify it, open the editor using the hyperlink:

At the top of the editor, the label dimensions and cell size are indicated, and on the left side there is a list of fields available for adding to the template. The addition itself is carried out by double-clicking the mouse on the selected available field (or by clicking on the selection button located to the right of the list of available fields).
The editable SE itself is located in the central part of the editor. When you select a cell, the properties palette for that cell is displayed on the right side of the editor (in which you can set, for example, the font format, set borders, etc.):

You can create a new SE in the editor based on a predefined one:

Let's add its article number in the header before the product name. Additionally, using the properties palette, change the font:

When printed, we get the following picture:

SHE is a regular spreadsheet document (complete analogy with Excel). For example, let’s completely clear the SE and create our own:

Add the article number, name, barcode and printing time:

After making all changes to the SE, it must be written down.
If different SEs are used for different types of items, this can be configured in the item types card:

If specific label or price tag templates are used when printing specific products, this can be configured in the item card:

Label printing
After creating the SE, we proceed directly to printing labels; to do this, open a workplace for group printing of labels and price tags:

First of all, let's set the print mode:

In order to print labels not for all, but only for selected items, you need to set up selection. Let's say we are only interested in the nomenclature with the form Furniture and only the one for which prices are set with the type Retail:

After setting up the selection, fill out the product table:

We see that the SE is filled in automatically:

By default, the number of labels is equal to the inventory balance of the item, but if necessary, you can set the quantity manually:

When printing we see the following picture:

When printing a label for the product Bedside Table, a barcode error occurred (because I set it arbitrarily, by entering random numbers, ignoring the formation rules), this should not happen in real life.
The standard price tag template in 1C: Retail does not have a barcode, but it is easy to add one, while the base will remain standard. How to do this, read further in the instructions.
IMPORTANT!
You can print price tags for an item only if it is in stock and prices have been set for it.
If everything is ready, go to the section Marketing, Further Pricing – Item prices.
A list of documents will open Setting item prices. It is from these documents that we will print price tags. Select a document with current prices and click Printing – Price tags.

A form opens with the same products that were in the selected document Setting item prices. You can print price tags for all items, and only for selected ones. You can also select the type of prices that will be printed on the price tag: to do this, set the switch on the button "By type of price" and select the required price type as shown in the figure below.

A window opens Templates for labels, price tags and KKM receipts. Our next step is to develop a price tag template. Click on the button Create.

Choose Template type – Label (price tag) for a product, set a name, for example “Price tag with barcode”. Next, click on the button Edit Layout.

The window opened Editing a price tag (label) template.
We will not create a template from scratch, but simply modify the built-in example. This will help save time.
Press the button Load default template, select from the list Price list.

A standard price tag template opens; it does not contain a barcode.
As you can see, the 6th line serves as a free space; we will increase its height and add a barcode there.

Place the cursor in the 10th line, select from the list on the left Barcode.
A dialog box pops up Add barcode, like the picture, click Yes.

The barcode appears in the template, but it is compressed in the cell. To enlarge the barcode image, select it and stretch it to the previously added cells.

Now the barcode is clearly visible on the price tag.
The optimal option: 2 horizontally and 4 vertically, for a total of 8 price tags on A4 sheet.

Click OK and in the next window Save and close.

As you can see, the Print Template column is filled with the name of our new template. Next, press the button Seal.
Ready. This is what our barcodes will look like

Price tags and labels are printed using processing Printing labels and price tags (Service - Labels and price tags - Printing labels and price tags). This processing is also called from all documents that have a tabular part. Processing in a document is called from the menu Service - Print price tags.
Important!
When printing labels, the 1C: Barcode Printing control is used. In order for label printing to be available, you need to install the 1C: Barcode Printing control from the ITS disk.
Processing is an additional dialog box in which parameters for printing price tags and labels are configured.
Price tags can be printed for any type of price ( Prices by price type) or in accordance with the prices set in the store ( Prices by store). Price values must be registered with the relevant documents: Setting item prices or Setting prices in the store. In both cases, prices are filled in in accordance with the date indicated in the processing.
Price tags and labels are printed for those products that are flagged in the processing tabular section Products for printing. In field Number of copies. indicates the number of copies to be printed.
To fill out the tabular part of the processing, click the button Fill.
Automatic filling of the tabular part depends on the selected selection parameters. If the checkbox is checked Only in stock and a specific store and warehouse are specified in the selection parameters, information about those goods for which there is a balance in the specific store warehouse will be filled in.
In the selection parameters, you can set various filters for item items. To do this, in the selection parameters you need to select Nomenclature and set the necessary selection parameters.
In processing, you can make a selection by item groups ( In Group), by the list of groups (In a group from the list) or by a list of randomly selected products ( On the list).
You can also print items that belong to only one organization.
If you need to print price tags and labels only for those products for which prices have changed, then you need to check the box and set the date of the price change. You can also additionally set selection at specific prices or at prices within a certain range.
Example
It is necessary to select goods whose price is in the range from 500 to 2000 hryvnia. In the selection parameters, set the filter Price - Interval (>,<) 500 2000 и нажмем кнопку Fill. Those products whose prices are within the specified range will be selected.
All parameters specified in the selection apply in combination. That is, if you add the Only in stock checkbox to the selection given in the example and specify a specific warehouse in the selection parameters, then goods that are available at this warehouse, the prices of which are in the specified range, will be selected.
The processing header indicates Organization And Shop, which will be printed on price tags and labels. If these parameters are specified, then regardless of which organization or store the product belongs to, information about the specified store and organization will be printed on the label.
As a selection criterion, you can also select any of the documents that have a tabular part or a list of documents.

After the list of documents is completed, you must click the button Fill. The tabular part of the processing will be filled with those goods that are present in the specified documents. In addition to this condition, you can check the box Products for which prices have changed and refill the list of products again. Only those products for which a price change has been registered will remain in the list.
Price tags and labels are printed at the touch of a button Seal.
Price tags and labels can be printed from any document that has a tabular part, from the menu Service - Print price tags.
Price tags and labels are printed in accordance with the specified template ( Sample). You can set several print templates, for example, separately for printing price tags and printing labels. The list of created templates is stored in the directory.
Setting up a price tag or label print template
The program provides the ability to change the price tag or label printing template and add new templates.
Open the directory Template storage (Service - Labels and price tags - Label and price tag templates).
This directory already contains one template - a standard one. You can edit it or copy it and create a new one based on it.

To copy the template, click the button F9(or the corresponding icon on the toolbar). Specify the name of the new template and then successively click the Write and Edit template. A form for editing the price tag or label template will appear.

In the template, you can change the order of the fields, add a new field from the list of fields that are given on the right side of the template ( Available template fields).
If a field is added Barcode, the product barcode for the label will be printed.
The procedure for working with the template is similar to the procedure for working with tables in the 1C:Enterprise 8 program. You can add any picture to the template, change the font of the displayed field, etc.
In field Number of copies the number of copies of price tags or labels is indicated vertically and horizontally. In this case, it is automatically determined whether the specified number of price tags (labels) fits at a given sheet orientation.
By button Preview you can see the modified form of the price tag or label.
Button Download serves to load and edit an existing template.